
How to generate a new RFQ
How to generate a RFQ (Request For Quote)
###### We are excited to get you going.
Here is a full step by step guide on how to generate a new RFQ successfully.
Would you like to watch a full tutorial video ?? Pls check the following link:
https://www.loom.com/share/238f5e8240b44ee49652b8870211b0d9
Would you like to watch a full step by step guide on how to generate a new RFQ successfully.
Pls check below full detailed guide:
1. Navigate to https://app.proboxx.co/
2. Log in to your Proboxx portal
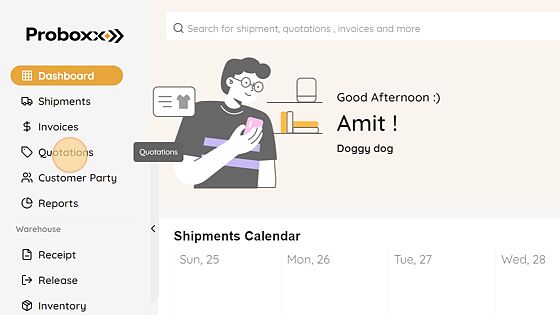
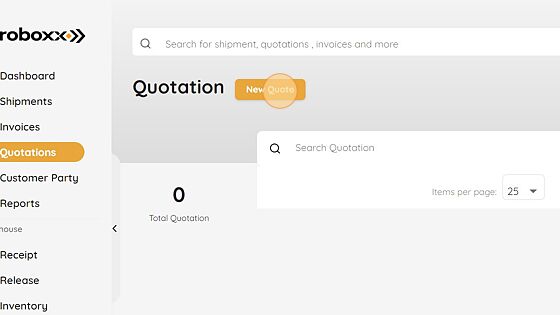
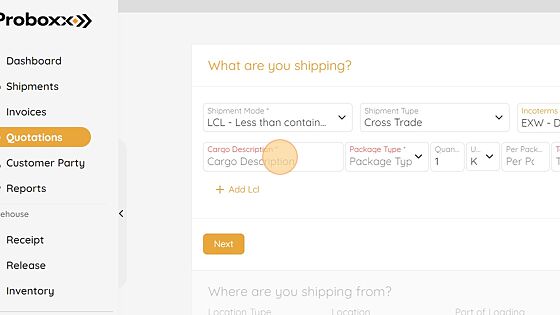
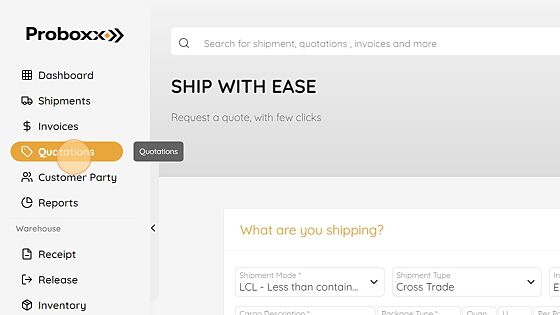
3. Click "Quotations"
4. Click "New Quote"
5. Under "What are you shipping?" Enter in your details.
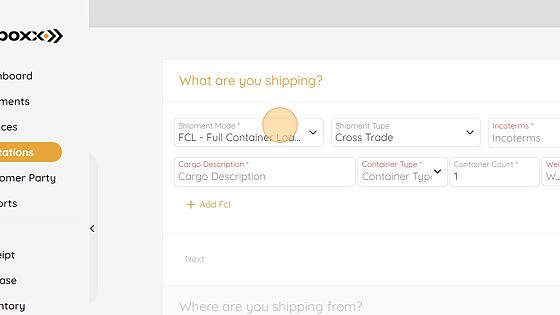
6. Choose the shipment method based on your exact needs.
In this example I have an LCL shipment.**

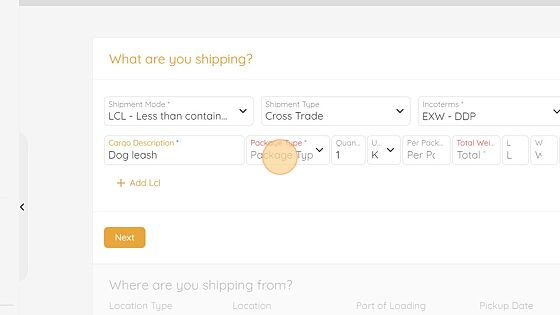
7. Under the Incoterms field, select the Incoterm you are using that has been agreed to between you and your supplier / shipper.
8. In this example, my Incoterms are EXW and i would like to get a DDP quote from Proboxx.

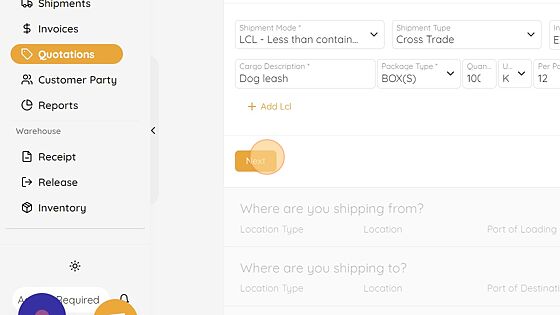
9. Under the " Cargo Description" field, add your product description
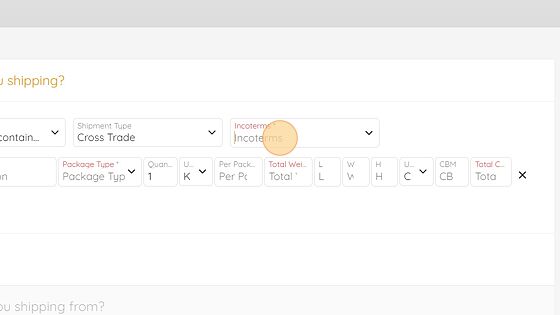
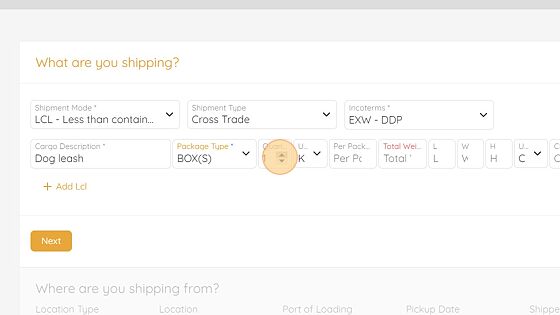
10. Under "Package Type" - if you ship as floor loaded, choose cartons.
If you ship goods on pallets, just select pallets.**
11. Under "Quantity", add your cartons (MC) & pallet count number
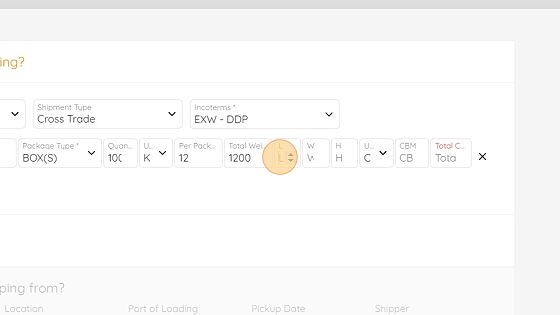
12. Click the "Per Package Weight" field and add your box (MC) or pallet weight.
Proboxx software will automatically calculate your total cargo weight.**

13. Now, just add your box (MC) or pallet dimensions in L / W / H.
Make sure you choose the right dimensions unit (CM / INCH).
Proboxx software will calculate automatically your total CBM per cargo dimensions.**
Tip! In case you have multiple loads going from the same supplier - you can add each load under "Add LCL".

14. Click "Next"
"Where are you shipping?"
15. Now, we move to the next section to complete your RFQ
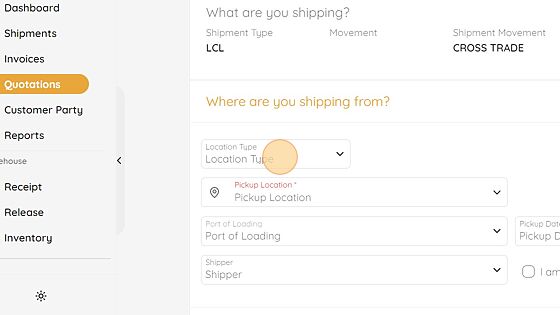
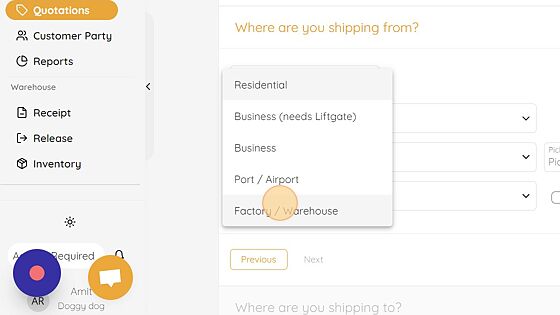
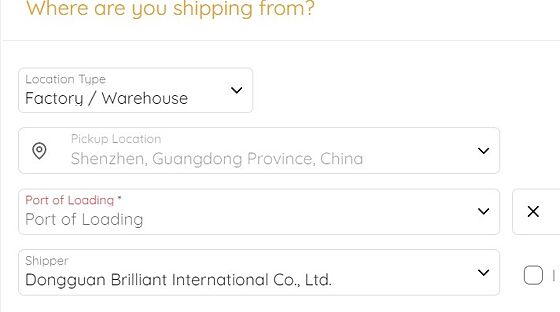
16. Under "Location Type", select your pick up address type.
In this example, we have arranged the pick up to be from our supplier / shipper. In this instance, the selection will be 'Factory / Warehouse'**
Tip! The Proboxx team highly recommend to add in advance all your shipper / consignee details under the "Customer Party". This will help generate the RFQ efficiently and effortlessly.
To access our guide on how to create a Customer Party head here: https://scribehow.com/shared/How_to_add_new_customer_party___0qScU1YRlKo5GnEgKPuxA**
17. Choose the specific Shipper from your "Shipper" list.
If you add your shipper details correctly based on our guide, the
"Pick up location" will immediately appear in the desired field.
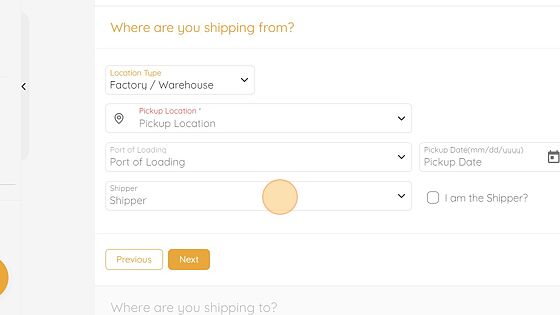
18. Choose your preferred Shipper from your Shipper's list.
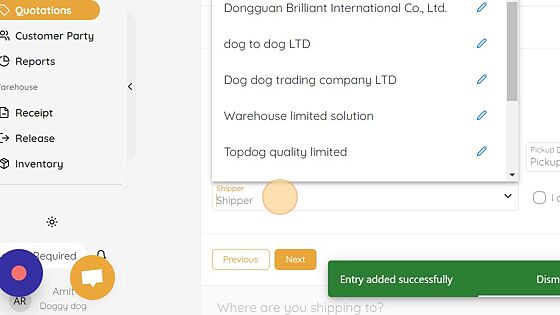
19. In this example I chose my Shipper "Dongguan Brilliant International Co., Ltd."

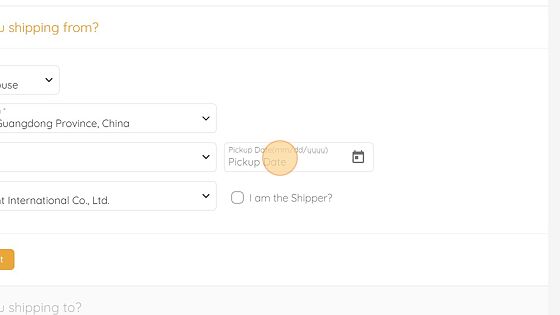
20. Click the "Pickup Date(mm/dd/yyyy)" field and select the pick up date.
21. If all the fields have been entered successfully, click "Next"
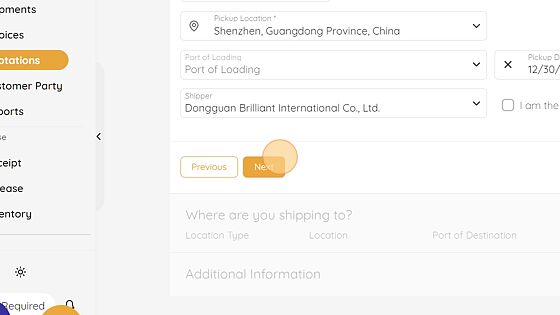
Alert! If your shipment is based on Incoterms FOB, it will be mandatory to add the port of loading under "Where are you shipping from"**
"Where are you shipping to"
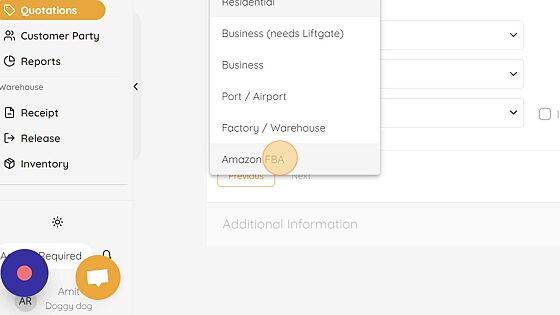
22. Now, we move to the next section, "Location Type":

23. Under "Location Type" select your delivery location type.
In this example, the cargo is being delivered to an FBA center, so the selection is Amazon FBA**
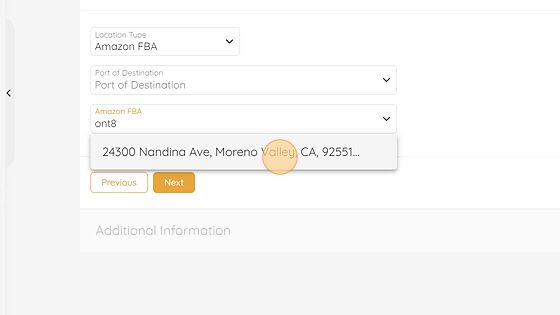
24. Under "Amazon FBA" field, enter in the FBA center code and
the specific FBA center address will pop up**

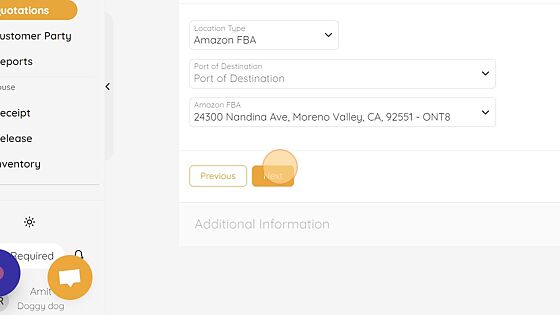
25. In this example, the goods are being shipped into ONT8.
I enter ONT8, and the ONT8 FBA center address appears.
26. If you need to deliver your cargo into a 3PL, under Location Type, please choose "Factory / Warehouse" and select your Consignee via your Consignee's list. If you pre-entered this in the Customer Party tab, you can select your Consignee from the drop down menu.
Tip! The Proboxx team highly recommend to add in advance all your shipper / consignee (3PL) details in the Customer Party section. You can access our guide on how to create a Customer Party here: https://scribehow.com/shared/How_to_add_new_customer_party___0qScU1YRlKo5GnEgKPuxA. It will help generate the RFQ more efficiently and effortlessly.**
27. Click "Next"
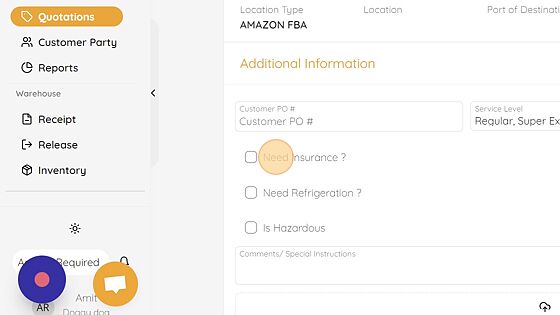
"Additional Information"
28. Now, we move on to the Additional Information Section
29. Customer PO (Purchasing order). Do you have a PO number with your Shipper? You can simply add the PO number in this section.
30. "Service Level". Here you have the option to choose your shipment type, based upon your needs.
Do you need a regular shipment?
Or maybe you need express or a super express service.
You can select more than one option, to receive quotes to compare.
The Proboxx team will send you a quotation based on your selection(s) accordingly.**

31. In this example, I chose the "Regular" shipment type & the "Super Express" option

32. If you need Insurance for your freight, just select the box and add your goods value and currency.
33. Click the "Currency" field.

34. Select the currency relevant to you. In this example I selected "USD"

35. Double-click the "Cargo Value" field to enter the value of your goods.

Click on "Send Request". The Proboxx team will start working on your quote straight away and give you the most cost effective quote to suit your shipment needs.
36. Click "Send Request"

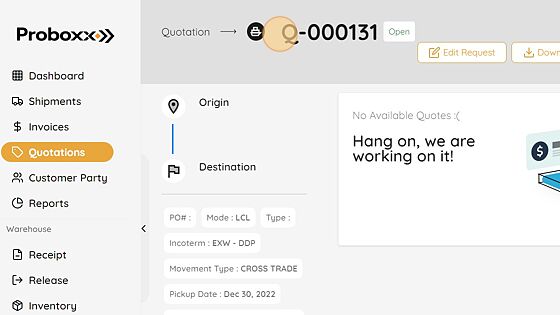
37. Once the quote has been generated, you will receive a Quotation number inside the Proboxx dashboard.
Need to edit your request?
38. Just click on "Edit Request" and you can edit any section or field required.

39. You can then modify your Quotation to whatever you need it to be.
Made with Scribe
Updated on: 16/01/2023
Thank you!